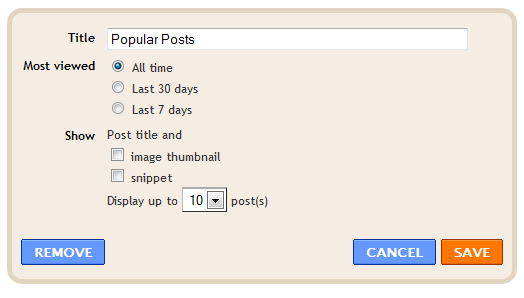
The most strong and popular web design trend over last couple of years is a sliding horizontal panels also known as Sliders or Carousels. It's a very effective method to increase the web site usability and engage the user. This widget shows the most popular 10 posts on your blog just above your Blogger posts. You can see the Demo on my blog.
 Let's start adding it
Before adding it you should know that this widget is not fully compatible with all templates, so please make a backup before making any changes to your blogger template. Now, follow these steps:
1. If you are using the old Blogger interface:
3. Just above/before it, add the following code:
Note: you can adjust the size of gallery, changing the values in red (590 and 126).
4. Now search for the following piece of code:
5. Just above/before it, add this code:
Next thing to do is to place the widget just above the blogger posts.
6. Search for this code:
...or if you can'find it, search for this one:
7. Just below it, add the following code:
Note: delete the fragments of code in blue if you want this widget to be displayed in posts pages also.
8. Preview and if everything is ok, Save the Template.


Before adding it you should know that this widget is not fully compatible with all templates, so please make a backup before making any changes to your blogger template. Now, follow these steps:
1. If you are using the old Blogger interface:
- Go to Dashboard - Design - Edit HTML - (make a backup) Expand Widget Template
- Go to Dashboard - Template - Edit HTML - Proceed - (make a backup) Expand Widget Template
]]></b:skin>
3. Just above/before it, add the following code:
CSS CODE
#gallery{position:relative;margin:0 35px 20px;width:590px;height:126px;background:#ffffff}
#gallery .belt{position:absolute;top:0;left:0;list-style-type:none}
#gallery .panel{float:left;margin:20px;width:84px;height:86px;background:url(https://blogger.googleusercontent.com/img/b/R29vZ2xl/AVvXsEgCrHOFF_AjQo71ZiRr2Gz0EQm7Kz1Bskf90OXicrR_uACLTYstManjnsd_NPci42FRxxmBVMAsrw_DZiV9FyG2Vz7pTHiP8tDzvJZUMR8JZjjW6XKLIZdeFma-PdBaJsyOkYNCyxLSqtUb/s1600/bg-slider.png) bottom center no-repeat;overflow:hidden}
#gallery .panel img{float:left;border:1px solid #DDD;margin:5px;width:72px;height:72px;background:#FFF;padding:0px}
#gallery .panel img:hover{filter:alpha(opacity=50);-moz-opacity:0.5;-khtml-opacity:0.5;opacity:0.5}
Note: you can adjust the size of gallery, changing the values in red (590 and 126).
4. Now search for the following piece of code:
</head>
5. Just above/before it, add this code:
<script src='http://ajax.googleapis.com/ajax/libs/jquery/1.4.2/jquery.min.js' type='text/javascript'/>
<script src='http://helplogger.googlecode.com/svn/trunk/auto-slider.js' type='text/javascript'/>
<script type='text/javascript'>
//<![CDATA[
stepcarousel.setup({
galleryid: "gallery",
beltclass: "belt",
panelclass: "panel",
autostep: {enable:true, moveby:1, pause:6000},
panelbehavior: {speed:500, wraparound:true, persist:true},
defaultbuttons: {enable: true, moveby: 2, leftnav: ["https://blogger.googleusercontent.com/img/b/R29vZ2xl/AVvXsEhSLNbnkmW1Kf2n8UPR051w7O-i0LrEBLKnGUgag3CH3SjZE-5HfUY_e8RS7XMQON9pdLlo_Gw-6dyEbJf2mtgCDhS7tg2CycBBszTv16U3z4bBkVOFIEcB1XImabyJwb8NE13o2B0ohyphenhyphenzx/s1600/prev.png", -40, 36], rightnav: ["https://blogger.googleusercontent.com/img/b/R29vZ2xl/AVvXsEja2P4bw1XT4Ysd9f9qPWxUMlJfNTlhiOJBUtwh2YQbXYh6oUCO0GkHXT8tEkLwql6pbdKMv5sVOUmN3Ebx5FrMYkN-fdnNdkTw5pEZtNmtEsN5Y3mLvVVKVdkG61qkEhtbuDvIe7KfSqpb/s1600/next.png", 2, 36]},
contenttype: ["external"]
})
//]]>
</script>
Next thing to do is to place the widget just above the blogger posts.
6. Search for this code:
<b:section class='main' id='main' showaddelement='yes'>
...or if you can'find it, search for this one:
<b:section class='main' id='main' showaddelement='no'>
7. Just below it, add the following code:
<b:widget id='PopularPosts2' locked='false' title='Popular Posts' type='PopularPosts'>
<b:includable id='main'>
<b:if cond='data:blog.url == data:blog.homepageUrl'>
<div style='margin-top:20px;margin-bottom:70px;margin-left:-20px;'>
<div id='gallery'>
<ul class='belt'>
<b:loop values='data:posts' var='post'>
<li class='panel'>
<b:if cond='data:showThumbnails == "false"'>
<b:if cond='data:showSnippets == "false"'>
<a expr:href='data:post.href' expr:title='data:post.title' rel='bookmark'><data:post.title/></a>
<b:else/>
<div class='item-title'>
<a expr:href='data:post.href' expr:title='data:post.title' rel='bookmark'><data:post.title/></a>
</div>
<div class='item-snippet'>
<data:post.snippet/>
</div>
</b:if>
<b:else/>
<a expr:href='data:post.href' expr:title='data:post.title' rel='bookmark'>
<b:if cond='data:post.thumbnail'>
<img expr:alt='data:post.title' expr:src='data:post.thumbnail'/>
<b:else/>
<img alt='no image' src='https://blogger.googleusercontent.com/img/b/R29vZ2xl/AVvXsEje_sUHFz9Ul4Y-BQb_tj0KCmYAdTEqB514Dzyz0eGlTmO3Vs1lmMR91rUfbJ3nsfKBhjaXMwky7XoFt3bKo4bQ8zQi7blaDjyFmqmyp8PzDON3BH-7G8uCoTCeGrHYxlPFnlEBTm0cdSRB/s1600/no-image.PNG'/>
</b:if>
</a>
</b:if>
</li>
</b:loop>
</ul>
</div></div></b:if>
</b:includable>
</b:widget>
Note: delete the fragments of code in blue if you want this widget to be displayed in posts pages also.
8. Preview and if everything is ok, Save the Template.
Save this Image For Your Back UP:If Image Host down ,Upload this image
in any image host Website And Then replace the link in Above Code